As many of you know, I LOVE VALENTINE'S! Love the having a special holiday just to let people know how much you appreciate them! Love it!
All February I wanted to GIVE a lil' something to all my Lil' Red Roan friends. Today I am going to give a quick lil tutorial on how to make Lil' Red Roan frames. It is super easy & I just wanted to share a few helpful tips I've learned over the years!
Enjoy~
Mindy
Lil' Red Roan
Supplies needed:
- Unfinished Wood Frame
- Apple Barrel Acrylic Paint 20432 Nutmeg Brown
- Apple Barrel Acrylic Paint 2613 Caribbean
- FOLK ART CRACKLE MEDIUM 694 for Acrylic Paint
- Paint Brush
- Small thin brush for your ink pad touch ups
- Coffee Bean Pigment Ink Pad
- Rubber Stamps of your choosing
- Spray Can of a Clear Coat

1. Pick out a Plain Wood Frame.
You can make a frame...or if you are un-handy like me..
Buy an unfinished frame at your local craft store.
You can make a frame...or if you are un-handy like me..
Buy an unfinished frame at your local craft store.

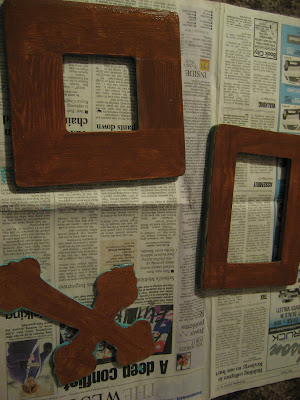
2. Put a base coat of paint on the top layer of your frame.
Any color will work, it just needs to be different than your top coat.
Here I used Apple Barrel Acrylic Paint 20432 Nutmeg Brown
LET DRY COMPLETELY
 After front coat is completely dry, flip your frame over.
3. Paint the entire backside.
Here I used Apple Barrel Acrylic Paint 2613 Caribbean
This is the color that your frame will be in the end.
Let dry completely!

 Now it's time for the magic!
4. Put a put a clear coat of FOLK ART CRACKLE MEDIUM 694 for Acrylic Paint
Let Dry Completely.
 Samples of others. I find it more time efficient to do at least a few at a time.
 Let Clear Coat DRY COMPLETELY.
Now for the tricky part.
5. Apply Top Coat.
It is very important to not go over the same spot twice. I've had the best luck when using a brush like the one shown below. Those bristles seem to be the most forgiving.
Let Dry Completely. :)
 6. Apply Ink Stamps in a design of your choosing!
I keep a small thin paint brush close by just for the ink in case you need to fill in any blank ink spots.
Let Dry Completely!
7. Spray with a thin layer of a clear top coat to set the ink.
Tada! You have your very own frame!
HAPPY VALENTINE'S!!!!
Rodeo Tales & Gypsy Trails is proudly brought to you by Lil' Red Roan
Join us on facebook
http://www.facebook.com/LittleRedRoan
Want someone else to do the work for you.
That's just fine too!
Lil' Red Roan frames available!
Here is a link to some frame choices
http://www.facebook.com/LittleRedRoan?v=photos&ref=ts#!/album.php?aid=34240&id=108331632540070


No comments:
Post a Comment